 English
  中文 (中国)
Product: DJControl Inpulse T7
This guide provides step-by-step instructions to calibrate the faders on the DJControl Inpulse T7, ensuring optimal accuracy and reliable performance.
Calibration Steps
Step 0: Preliminary Operations
- Disconnect all audio devices: speakers, headphones, microphone.
- Unplug the USB Type-B connector from the back of the DJControl Inpulse T7.
- Plug the USB Type-A connector into a powered USB port (computer or USB power supply).
- Set all faders to their minimum position (left or bottom).
- Close any DJ software currently running on your computer.
Step 1: Enable Calibration Mode
- On Deck 2, press and hold BACK and RANGE.

While holding both buttons:
- Plug the USB cable into the DJControl Inpulse T7.
- Press the POWER button.
- Keep holding both buttons for 10 seconds, then release them.
LED indicators:
- Buttons 1 and 2 on the FX1 panel light up.
- The BeatMatch Guide button starts blinking.

= Calibration mode is now enabled.
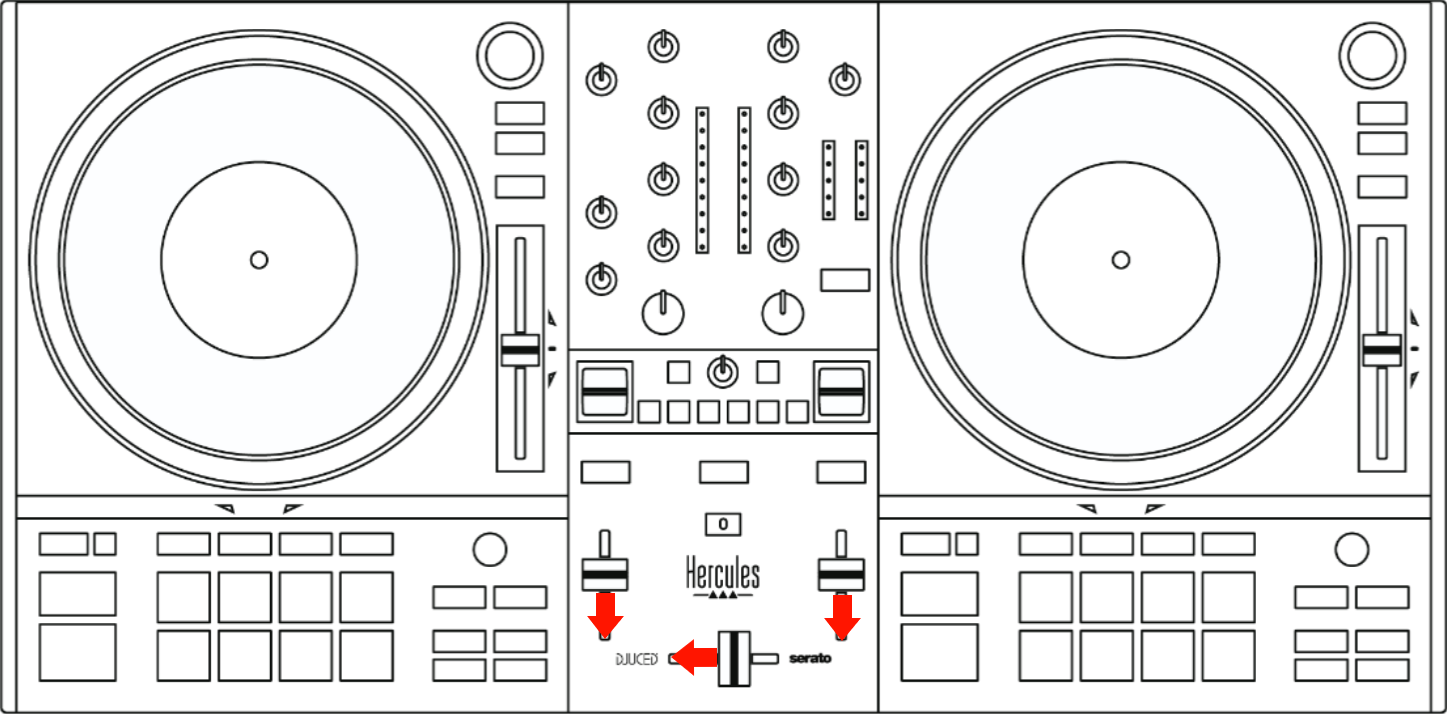
Step 2: Set All Faders to the Center Position
- Move all faders to their center position.
Press the BeatMatch Guide button once.
Expected result: Buttons 1, 2, and 3 on the FX1 panel and button 1 on the FX2 panel light up.

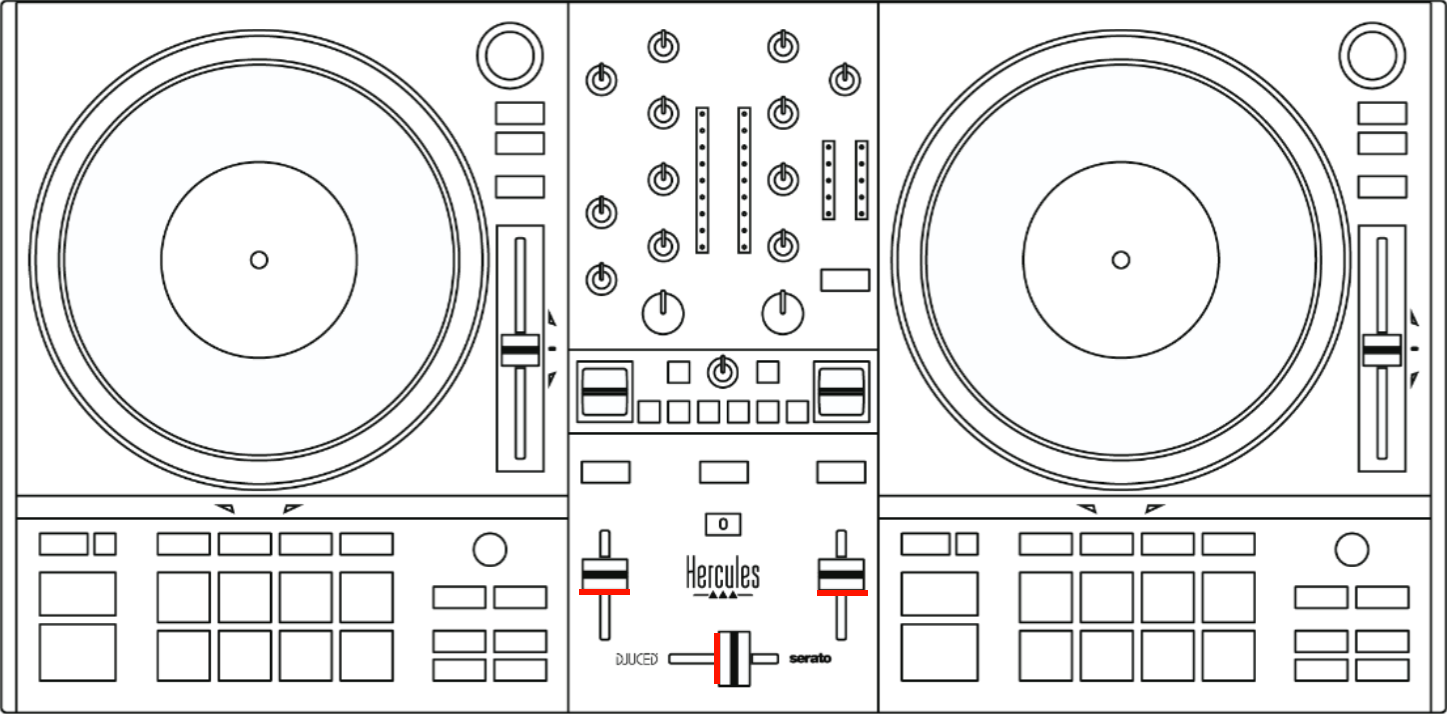
Step 3: Full-Range Calibration
- Move the crossfader fully to the left, then fully to the right.
- Move the volume faders all the way down, then all the way up.
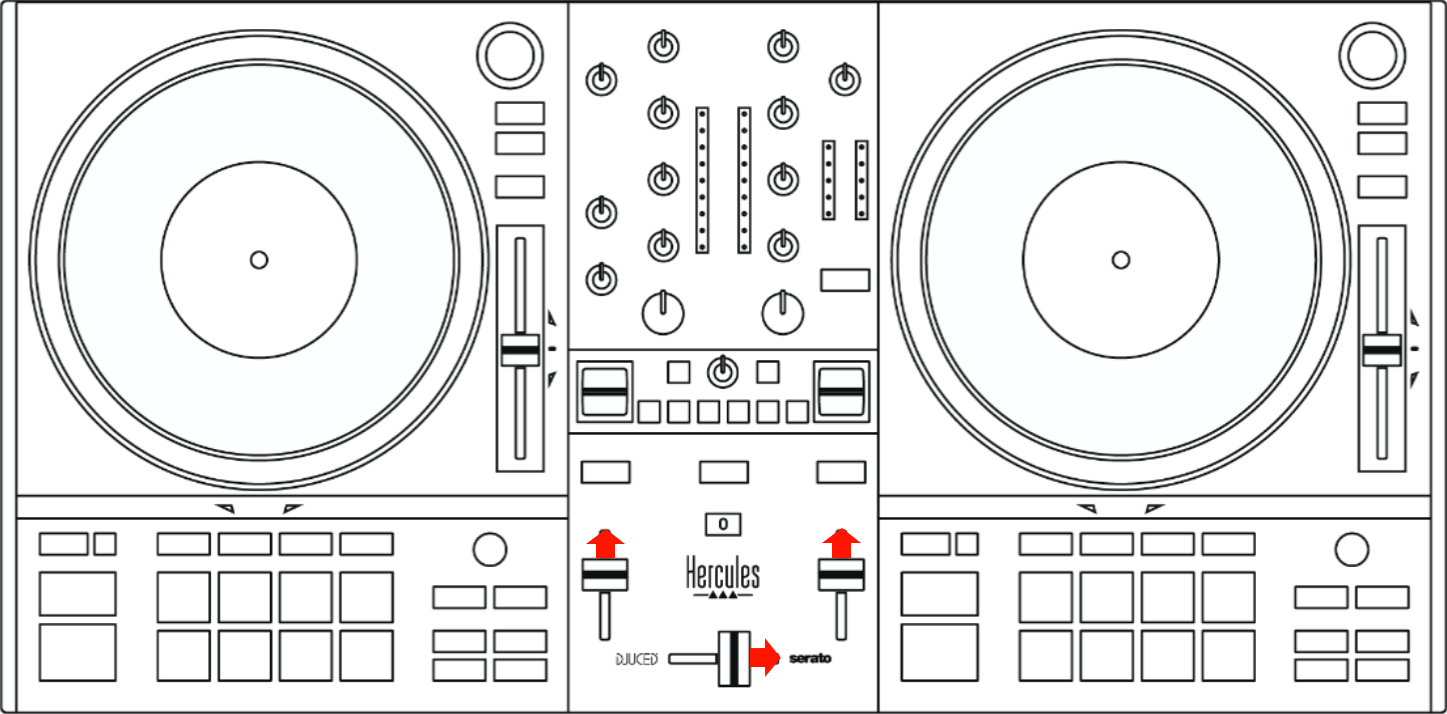
Press the BeatMatch Guide button.
Expected result: Buttons 1, 2, and 3 on the FX1 panel and buttons 1 and 2 on the FX2 panel light up.

If not: Calibration failed. Restart from Step 0.
If yes: Calibration completed successfully.
Disconnect the DJControl Inpulse T7 and reconnect it.
Calibration is complete.