 中文 (中国)
  English
Important: your Hue Bridge must be connected to the same local network as Stream Control.
Step 1 : On the Philips Hue settings page, you have 2 options: « Find a bridge » or « Add manually »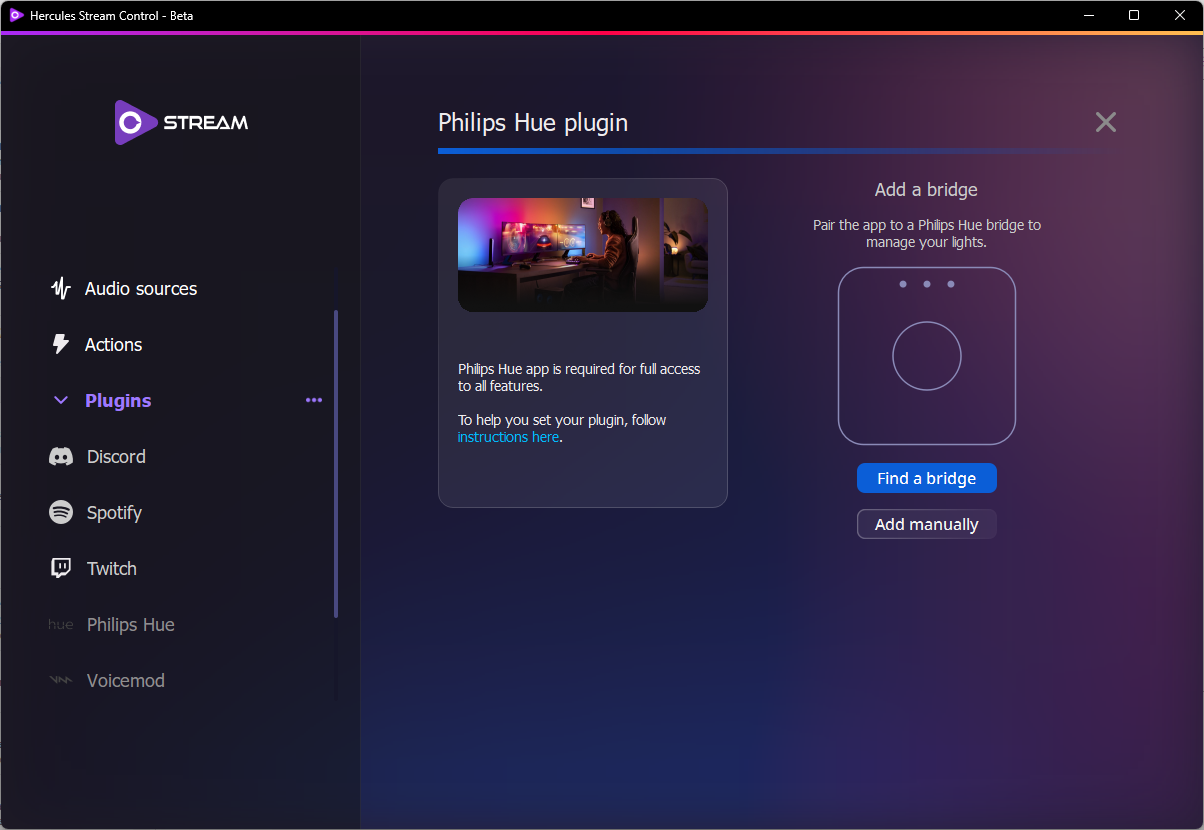
Step 2 : If you click « Find a bridge », wait for Stream Control to detect every bridge connected to the same local network. Then press the pairing button on your bridge to pair it.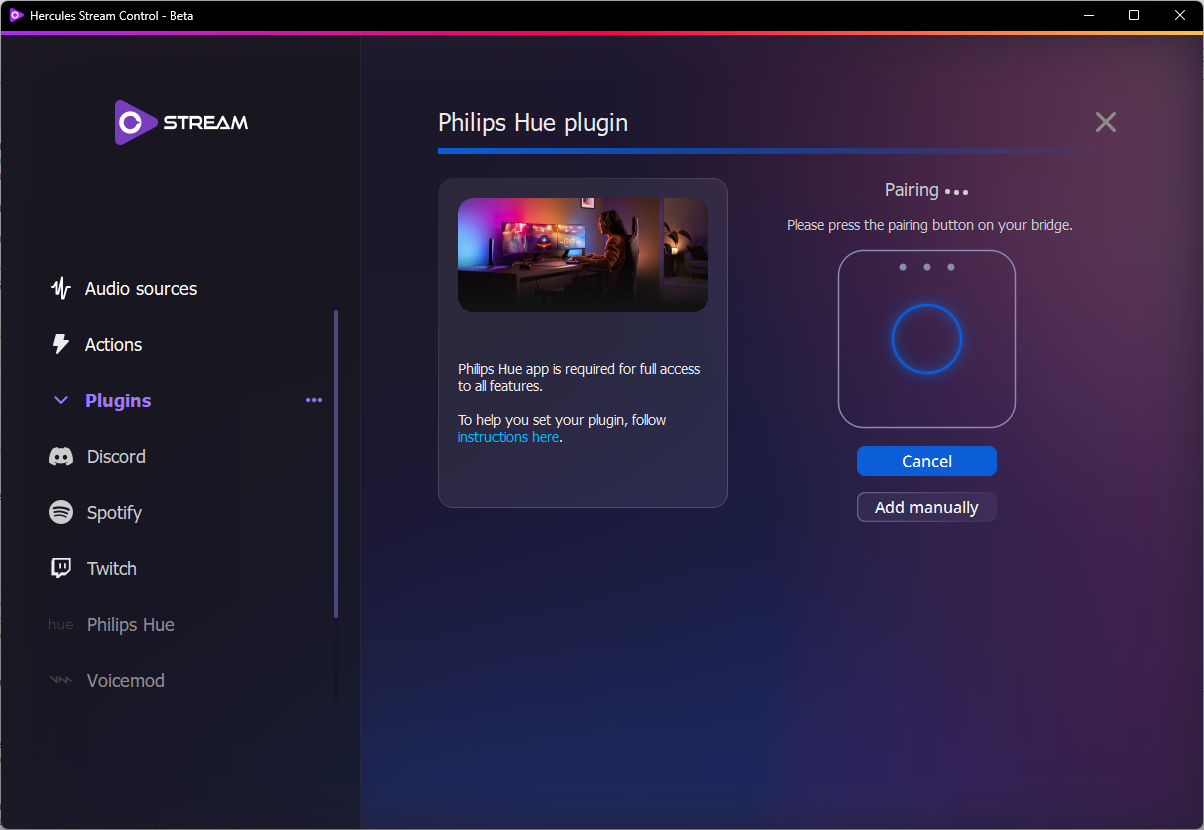
Step 3 : If you click « Add manually », type your Bridge IP to target the right bridge, then click « Connect ». To find your bridge IP, you can go on https://discovery.meethue.com/ and retrieve the “internalipaddress”.
Here again, you have to press the pairing button on your bridge.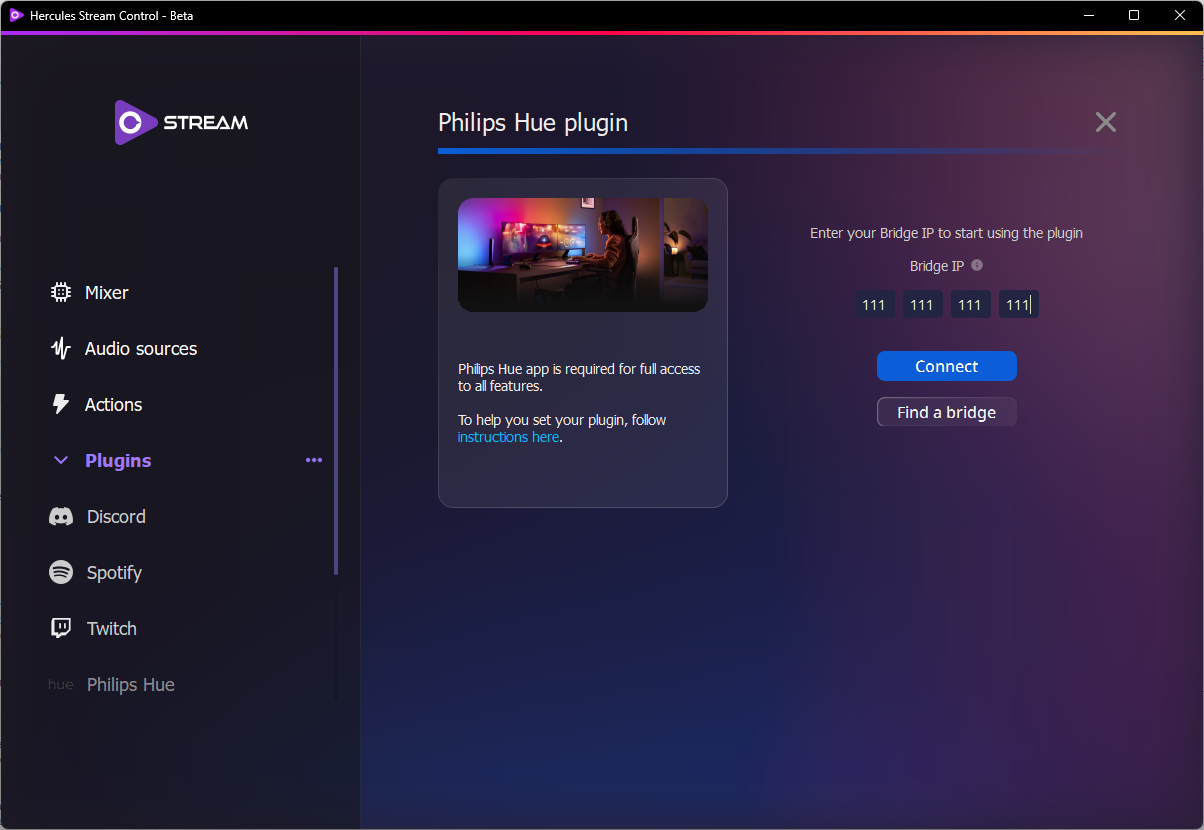
Step 4 : You are connected once your bridge appears in the list. From this page, you can Disconnect your bridge or pair another one with the « + » button.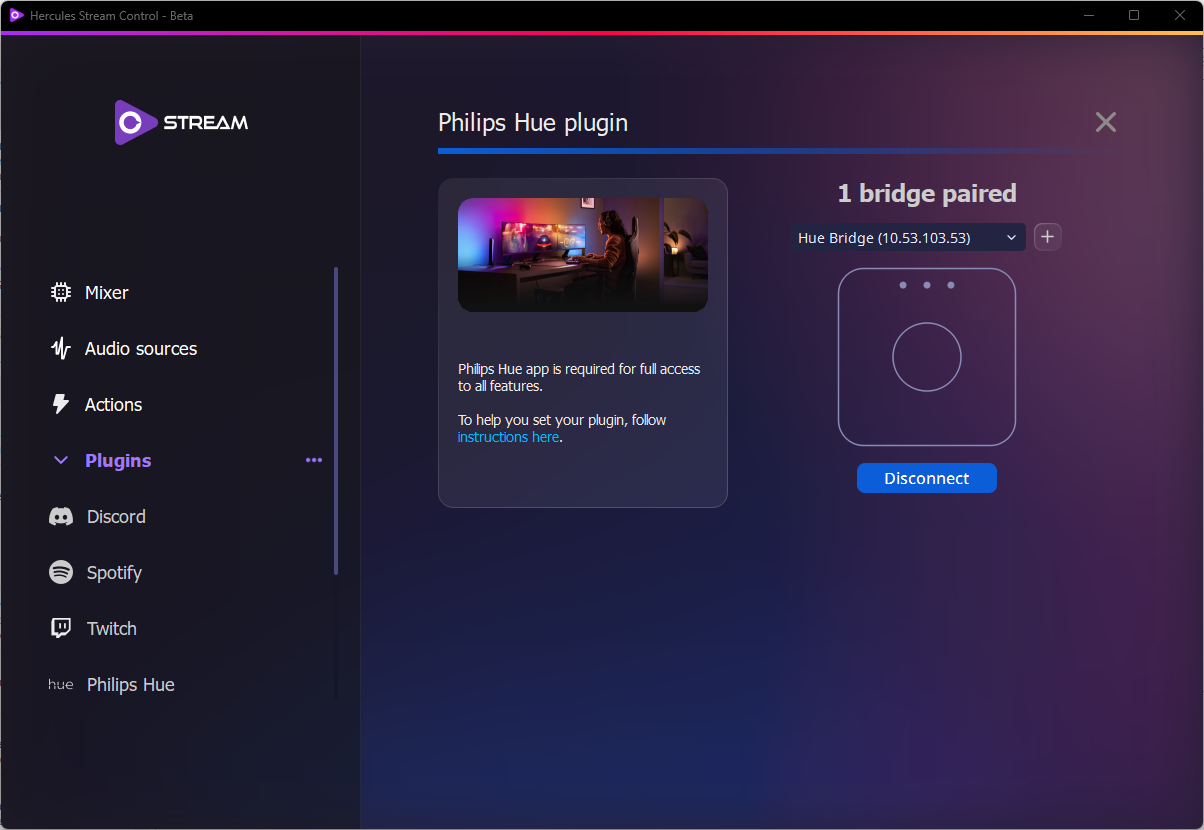
If the pairing fails, it may be due to:
Your Hue Bridge and your computer are not on the same local network
The bridge is powered on, but its network LEDs are off.
The pairing button on the bridge has been pressed before the pairing request
The Bridge IP typed manually isn’t the right one
Philips Hue features available in Stream Control
Once Stream Control is successfully connected to your Hue Bridge, you will be able to use the following features:
Turn ON and OFF lights
Set lights colors
Set lights brightness
Set scenario
Set lights white temperature
Build your own color loop (advanced scenario)